I recently found this Twitter thread by David Torkar, in which he explains how to add custom view modes to Unreal using post-process materials. So I tried it out and added a PBR validation mode, something which I felt was always missing from Unreal.
What are valid base color values?
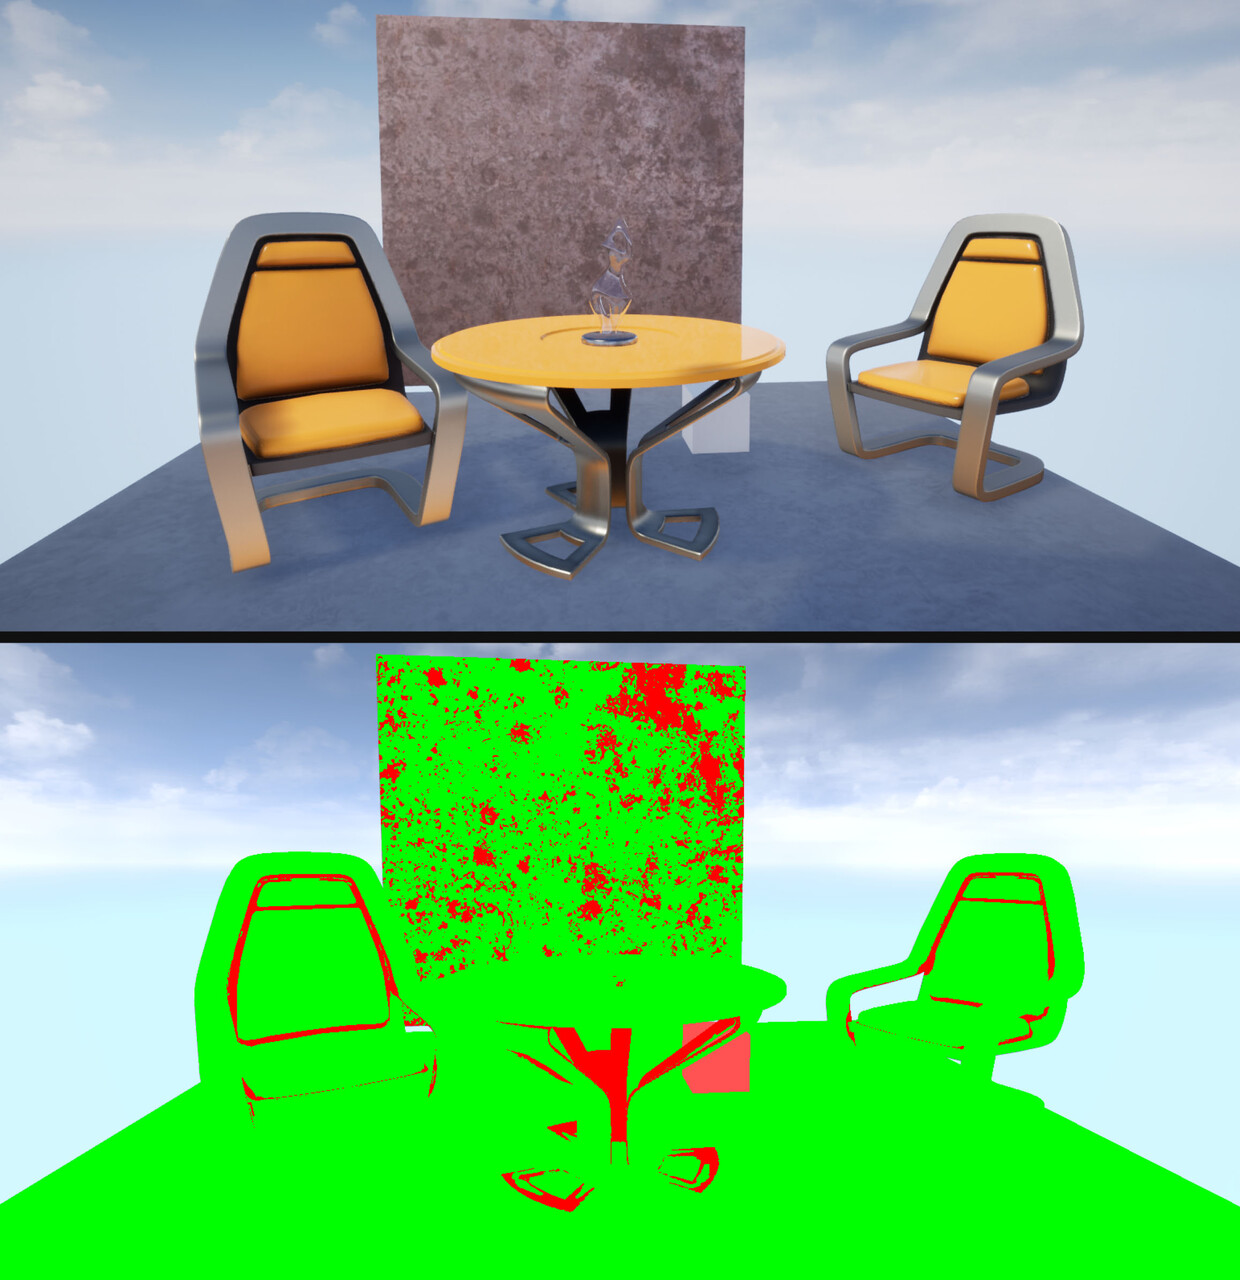
According to the usually used references, the lower limit for the base color values should be somewhere around 30-50 in a 0-255 sRGB range. The upper limit is usually set at 240. For metal reflectance values (which is technically something else than the base color, even though we use the base color input for it), the range should be 180-255.
While values can technically be out of this range, our goal is usually to replicate reality, and there aren’t really that many materials in the real world that are outside of this range. Even when creating stylized content, keeping all colors in a valid range is a good idea to make sure materials behave predictable under identical lighting conditions. If you choose to leave the range, make sure you have a good reason to do so.
The Validation Material
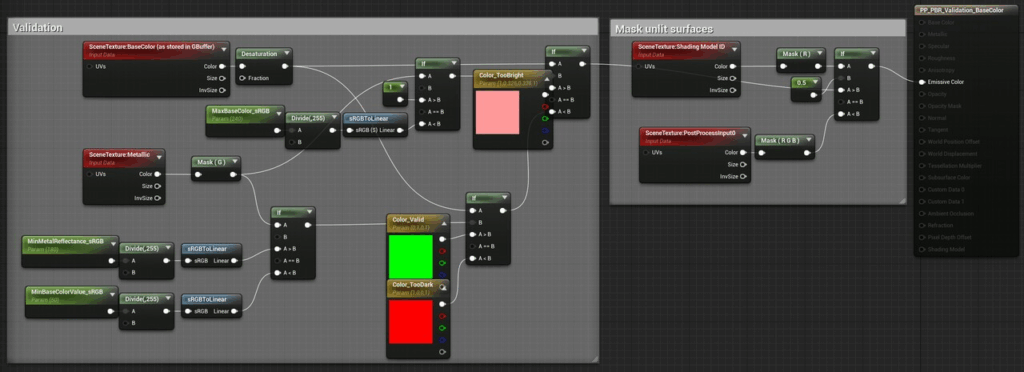
The material is quite simple. Since it’s not used at runtime, I didn’t bother too much with optimization and added the remapping and sRGB->linear conversion for the range parameters. From my experience, working in the 0-255 range is more intuitive for most people, since you don’t have to deal with decimal numbers. There are three colors used to mark values below, in, and above the valid ranges. At the end of the material, the shading model used for the current pixel is checked, and for unlit surfaces, the original color is kept. This helps with the orientation in the level since the sky is still visible this way.

Adding the View Mode
Now that the material works as intended, move it to a directory where it doesn’t get mixed up with the rest of the game, something like /Game/ViewModes/PP_PBRValidation_BaseColor.
Now, to add the view mode, open DefaultEngine.ini (located in the Config folder in your project directory) and add a new section:
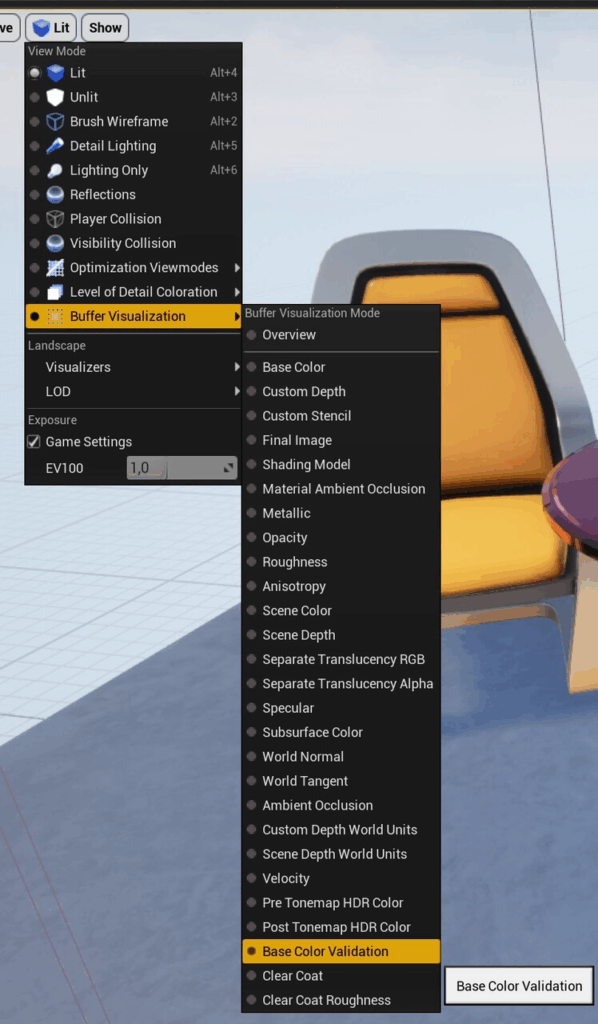
[Engine.BufferVisualizationMaterials]BaseColorValidation=(Material="/Game/ViewModes/PP_PBRValidation_BaseColor .PP_PBRValidation_BaseColor ", Name=LOCTEXT("BCValidationMat", "Base Color Validation"))After restarting the editor, a new entry appears in the Buffer Visualization menu:
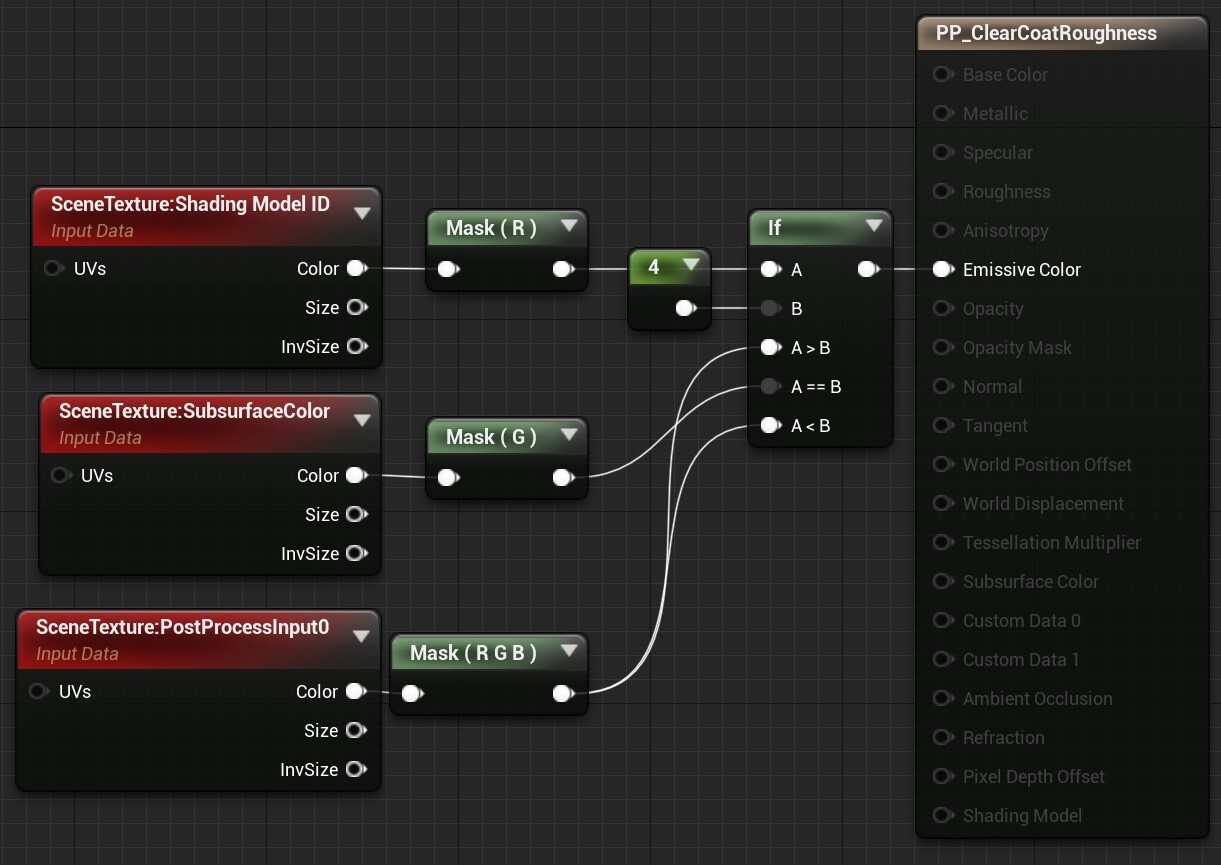
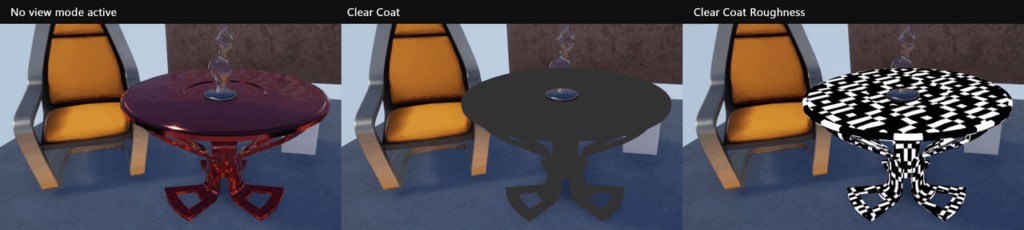
Other Materials
Using custom post-process materials, you can also display other useful information. These two materials visualize the clear coat and clear coat roughness values, which is useful when fine-tuning car paints:

Known Issues
All materials described above are jittering when used with TAA enabled, since TAA slightly offsets the image each frame. This helps to smooth the image over several frames, but since the PP materials are applied after the tone mapping, they aren’t affected by the TAA, which would smooth out the jittering. If it really annoys you, you can just disable TAA while working with the view modes.
You can also change the location of the material to be before the tone mapping, but if you’re using any color grading, LUTs, etc. in your game, these get applied during the tone mapping and can change the look of the view mode.
As you may already have noticed, using post-process materials isn’t a replacement for proper view modes, since you’re restricted to the information provided in the GBuffer. Still, it’s a nice trick to be aware of.
If this post was enjoyable or useful for you, please share it! If you have comments, questions, or feedback, post them below. To get new posts, follow me on Artstation.