
Unreal’s editor utilities allow you to improve and speed up your workflow by automating repetitive steps without having to modify the engine or learn C++. However, the documentation is lacking, so using them requires some patience to figure out how to use them correctly. So I thought it would make sense to share some insights on how to use them. Since there are many types of utilities, this tutorial only covers the actor action utilities, but everything is also applicable to asset action utilities, which work pretty much the same way.
Actor Actions
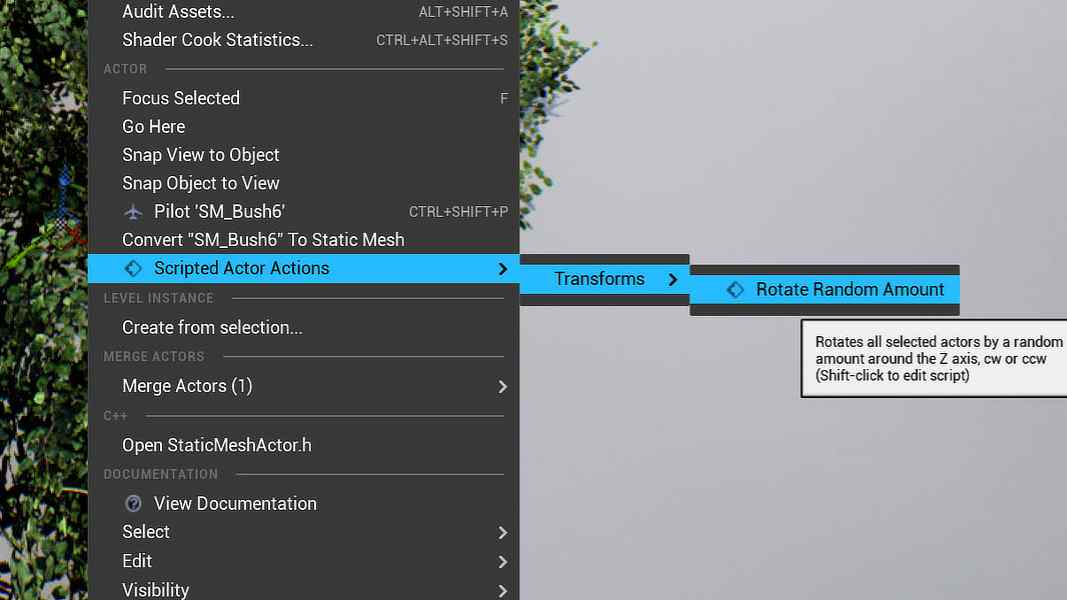
Actor actions are available in the context menu of any actor placed in a level:
While they can also do other things, the most common use case for them is to modify the currently selected actors in the viewport. Imagine you have a few hundred objects and you need to set property on all of them, but the property needs to vary from actor to actor or is dependent on circumstances like the distance to another object or the assigned material. Doing this manually could take hours, but using an actor action, it’s a matter of seconds and has less potential for error.
The action created in this tutorial rotates the selected actors around the Z-axis by a random amount within a customizable range. This is useful to break up the visible repetition.
Creating the Asset
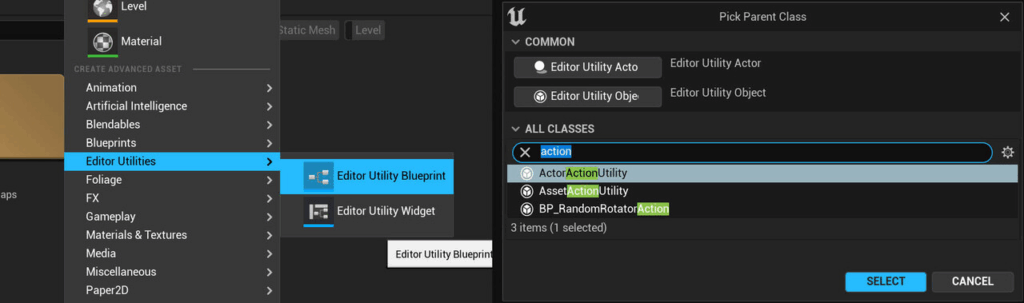
Editor Utilities are listed separately from blueprints in the asset creation menu. You have a wide range of options when selecting the parent class, but most classes are intended for very specific use cases and can be ignored most of the time. There are two action utility classes, one for actor actions and one for asset actions. They work pretty much the same, except that actor action utilities appear in the context menus of actors, and asset actions appear in the context menus of assets in the content browser.
Specifying the Supported Class
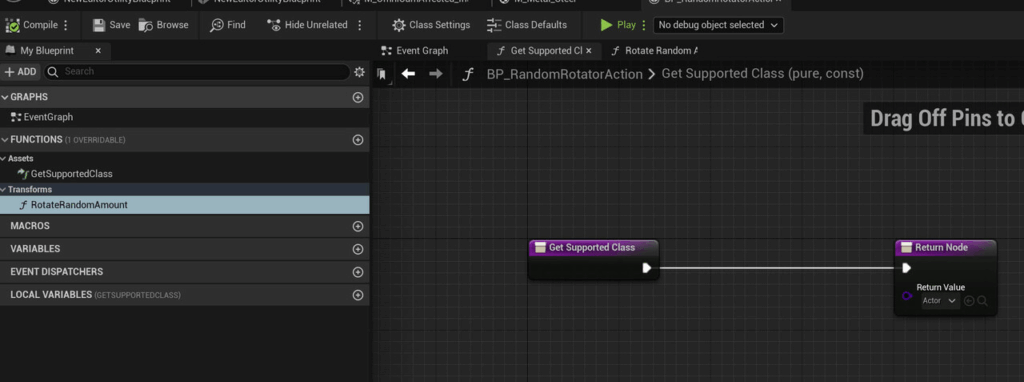
After creating the action utility, the first step is to override the GetSupportedClass function. In this case, I set the return value to Actor, but for most actions, you should specify a more specific class so that the action only appears in the context menu if it supports the current actor. Especially if you use a lot of actions, this helps to avoid clutter in the menus and prevents the users from running an action on a light that is intended to modify a mesh, for example.
Creating the Function
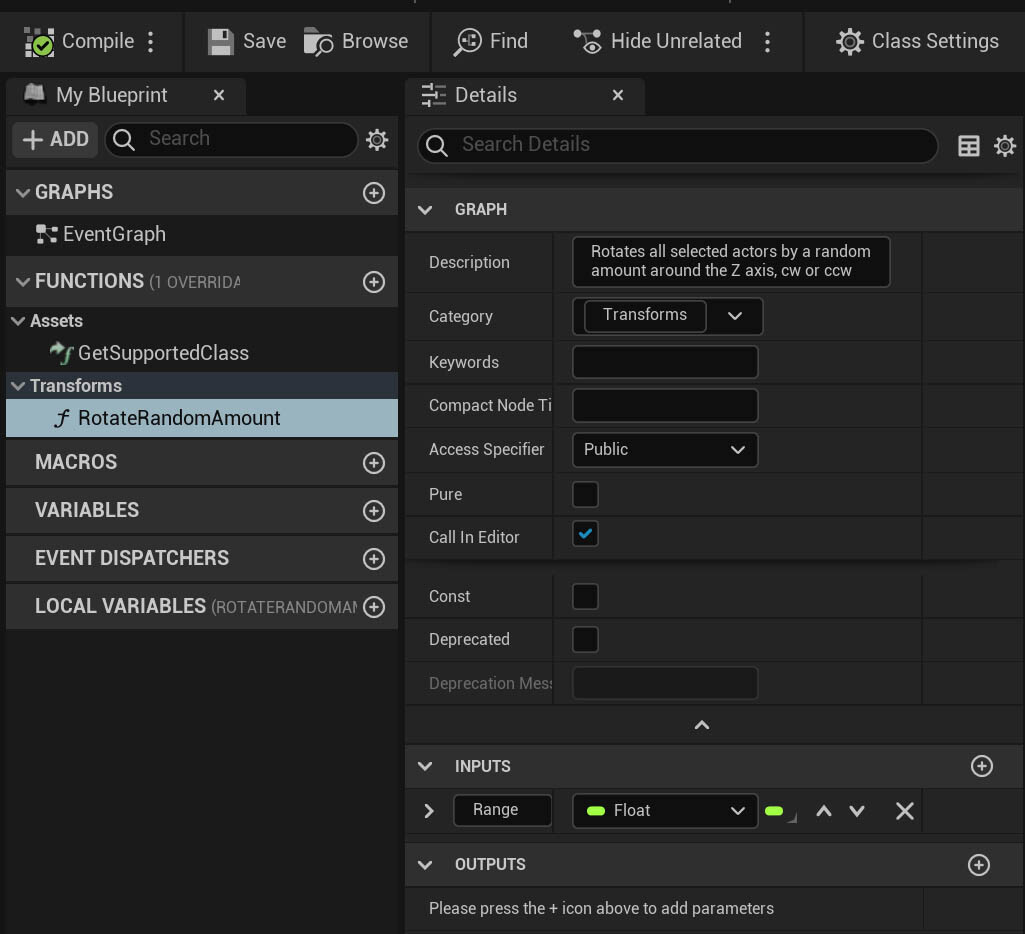
Any function added to the utility that isn’t pure and has Call In Editor enabled will appear as an action in the context menu. So if you’re creating functions to organize your code, disable Call In Editor. Also, be sure to add a description, it’s used to generate the action’s tooltip. If you use a lot of different actions, you can also add a category. Multiple actions with the same category will be grouped in the same submenu, making it easier for users to navigate the menus later.
The Function
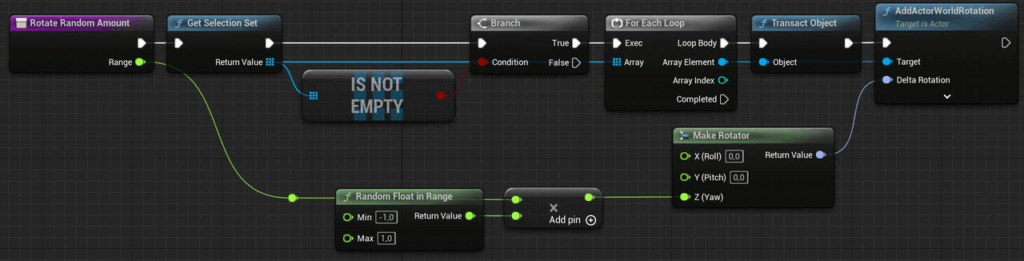
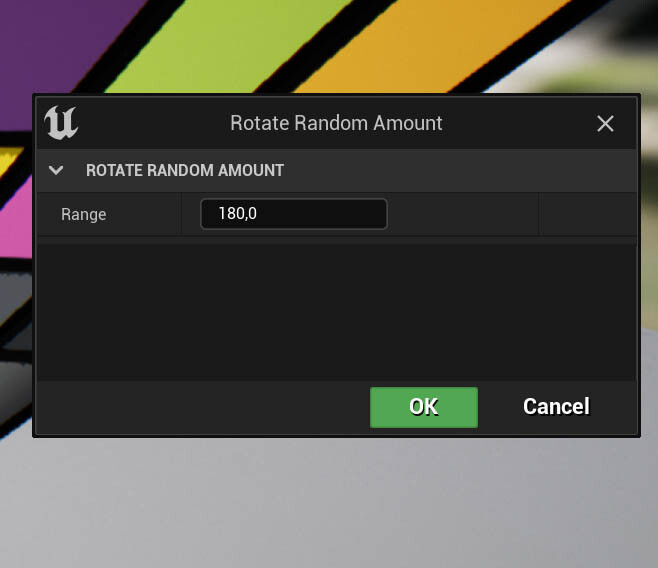
The function for adding the random rotation is quite simple. It gets the selection set, an array containing all selected actors, and uses a for each loop to add a random rotation to the Z-axis. The range of rotations is provided by a float input. When a function is called that uses inputs, a dialog window opens where you can set the values:
The Undo Stack
To make editor tools safer to use, make sure they use Unreal’s undo system. To do this, you need to wrap all steps in transactions. A transaction is a list of steps performed during that transaction and the previous state of modified objects. When you undo the transaction, this state is restored. So if you want to make all your changes undoable, you need to call the Begin Transaction node at the start, the Transact Object node for each object you want to modify, and the End Transaction node when everything is done.
Actor actions are already wrapped in transactions, but unless you tell the undo system to save object states using the Transact Object node, the transaction is empty and discarded. As you can see in the example function, each actor’s state is saved before the rotation, therefore the transaction contains changes and shows up in the undo history. Unfortunately, it’s just named Blutility Action. Blutility is the outdated name for editor utilities, but it still shows up here and there in the Engine.
For reference, this is how the function would look like if the action wouldn’t already be wrapped in a transaction:

This graph produces the same result as the previous one. When transactions are created during another transaction, they are simply added to that one. If this isn’t the case, it makes sense to plug something into the context and description inputs, so that the undo step has a name when it shows up in the undo history.
If you encounter problems with the transactions, the undo history is a useful debugging tool. Just enable the Show transactions details setting and you can see the lists of modified objects and even the properties changed on those actors:

Running the Action
After saving your utility, you can run the action on any number of actors to add some variation:

While this is a rather simple example, actions can perform complex tasks and save you a lot of time.
Maintenance
If you use action utilities a lot, there are a few ways to make working with them easier:
- Keep all your action utilities (and editor utilities in general) in a folder separate from your game assets.
- Use a naming convention that tells you that this asset is an action utility. All editor utilities share the same asset type, so without a naming convention you won’t be able to tell their class immediately.
- If you haven’t managed to maintain a solid naming convention, you can also search for ParentClass==ActorActionUtility in the content browser.
- To make editing actions easier, you can press Shift while clicking on an action’s menu entry
If you enjoyed this article or found it useful, please share it with others! If you have any comments, questions, or feedback, please post them below. To get informed about new articles, follow me on Artstation, on Mastodon or Bluesky.