The Problem
While I usually avoid scaling meshes non-uniformly, there are situation when you’re kitbashing where it can be really tempting. At one point I was stretching a rock quite a bit to create a rock wall, and then I stumbled upon this phenomenon:
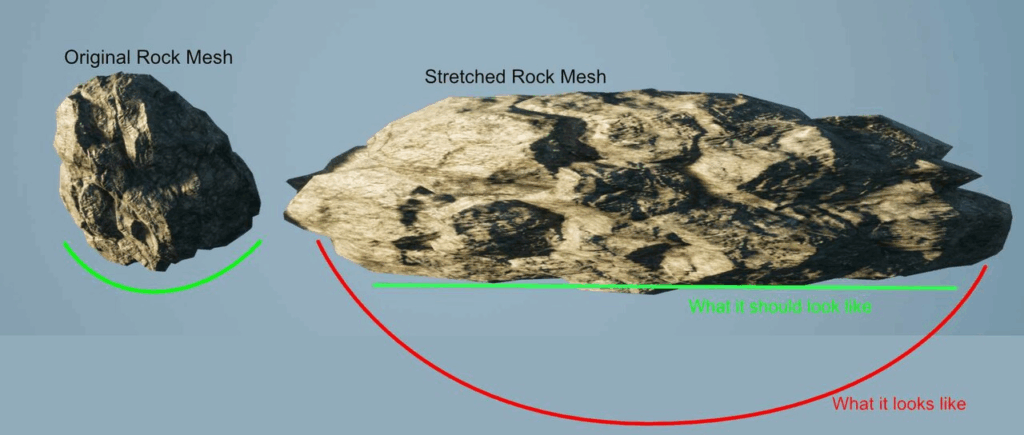
Even though the stretched rock clearly had the shape of a wall, the way the surface was shaded implied that it still had a cylindrical shape, to the point where it almost looked like I had stretched the rendered image instead of the mesh.
The Cause
After playing around with other meshes, I could confirm that Unreal does not adjust vertex normals when a mesh is scaled non-uniformly. And I do understand this decision: Non-uniformly scaling meshes isn’t really something you should be doing anyway. Stretched meshes quickly become obvious, so if you really need a mesh with different proportions, it’s usually a better choice to just start your 3D software and adjust your mesh in there properly.
If meshes are scaled non-uniformly, it’s usually because you’re prototyping something or participating in a game jam. So, in most cases, adjusting the vertex normals to compensate for stretching issues would just add extra work for the GPU. At the same time, while the normals in the image above are incorrect, it’s not something that many people will notice right away, so if it happens here and there, it’s not the end of the world.
Still, it’s a compromise, and so it’s likely that at some point you’ll run into this limitation and want to fix it. So let’s do that.
The Fix
The thread linked above already tells us what we need to do: Invert and transpose the object’s transformation matrix and multiply it by the vertex normals to get the correct normals.
If you’re familiar with Unreal’s material editor, you probably already know that it doesn’t work with matrices. To use matrices, you basically have to use multiple vectors that make up the matrix. It works, but it feels clunky, and even simple calculations can require a lot of wiring. So I knew from the start that I wanted to use a custom node and work directly with HLSL code.
I also knew I needed the transformation matrix of the object. Finding it was easy enough. You can get the HLSL code for any material from the material editor:
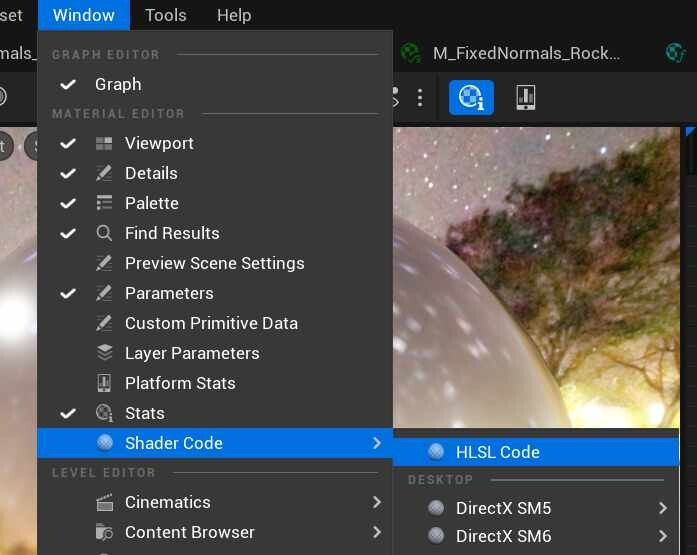
The generated HLSL code contains not only the code equivalents of the nodes placed in the editor, but also a lot of boilerplate.
I quickly found a function called GetLocalToWorld3x3() that returns the transformation matrix of the object. And even better, there’s a function called GetWorldToInstance(), which, as you may have guessed, returns the inverse rotation matrix.
One detail that was new to me was the return type: As a long-time Unreal Engine 4 user, I didn’t know what a FLWCInverseMatrix was. After looking it up, it turned out to be a matrix for Large World Coordinates, a new feature introduced in UE5 to solve precision problems in very large levels. Since the position of the object is not relevant for this purpose, I knew I didn’t really need the precision and could convert to a matrix with regular floats.
The release notes of UE 5.1 already mention a function called LWCToFloat().
So I looked for that function in Unreal’s shaders folder and found LargeWorldCoordinates.ush, which contains a lot of helper functions, including
LWCToFloat3x3(FLWCInverseMatrix Value).
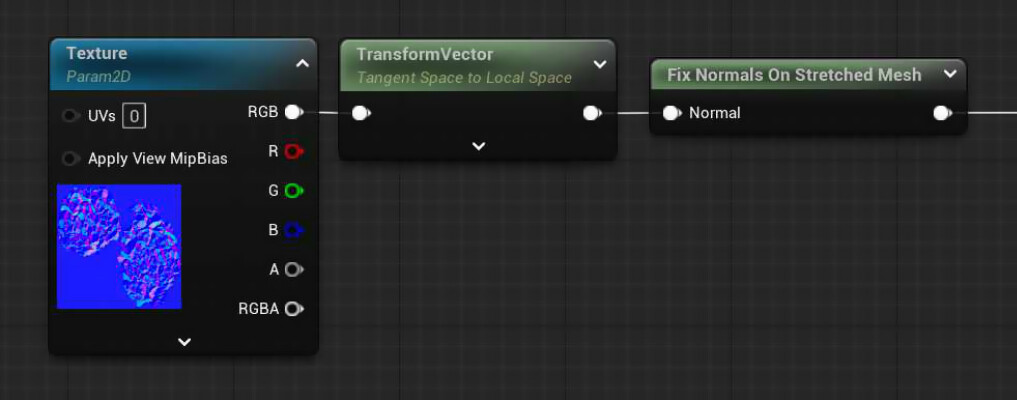
So at this point, I had everything I needed. The resulting custom node contains only 2 lines:
float3x3 invMat =LWCToFloat3x3(GetWorldToInstance(Parameters));
return mul(Normal, transpose(invMat)).xyz;
The node has an input for the normal, multiplies it with the inverted and transposed transform matrix and returns the result:
Results
Let’s take a look at the stretched rock mesh from the beginning:
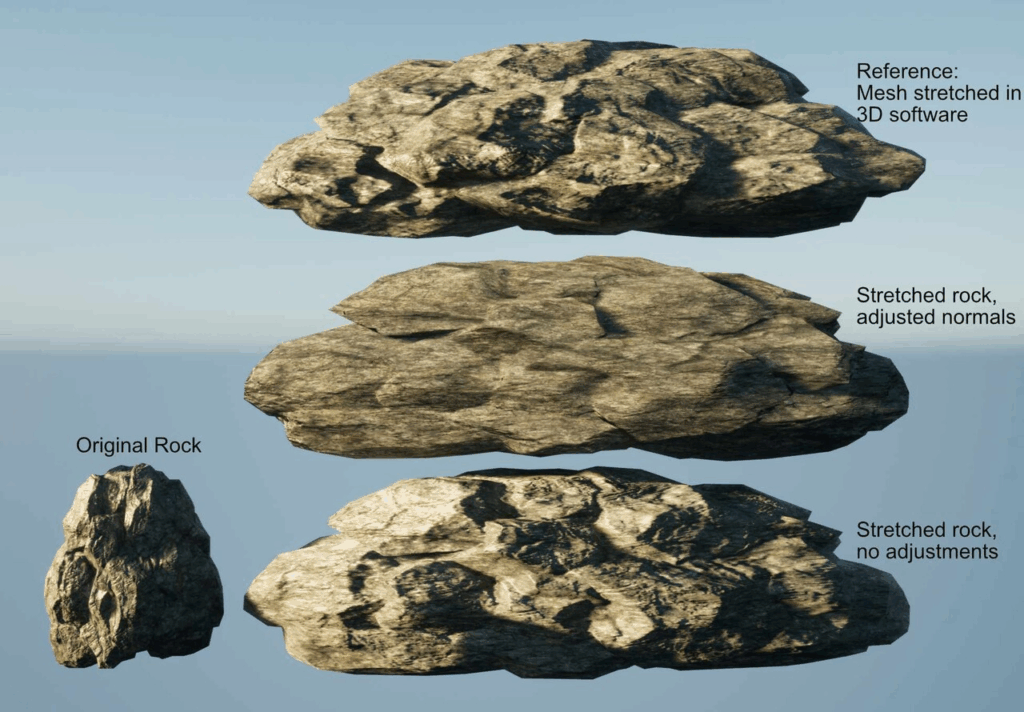
At the bottom, you can see the the same stretched rock again. In the middle, you can see the rock with the adjusted material. The difference is immediately obvious. The lighting is now much more even and really matches the shape of the mesh, which is now essentially a wall.
At the top, you can see another version of the mesh. This mesh has been stretched in Blender, and the normals were recalculated. You’d probably expect this version of the rock to look identical to the one in the middle with the normals adjusted, but it looks more like a mixture of the other two versions. That’s because this rock is still using the same normal map. If stretched the high poly and low poly versions of the rock and baked a new normal map, the result would be much closer to the rock in the middle.
To have a less specific example, here is a comparison of a stretched mirror spheres with and without the fix:
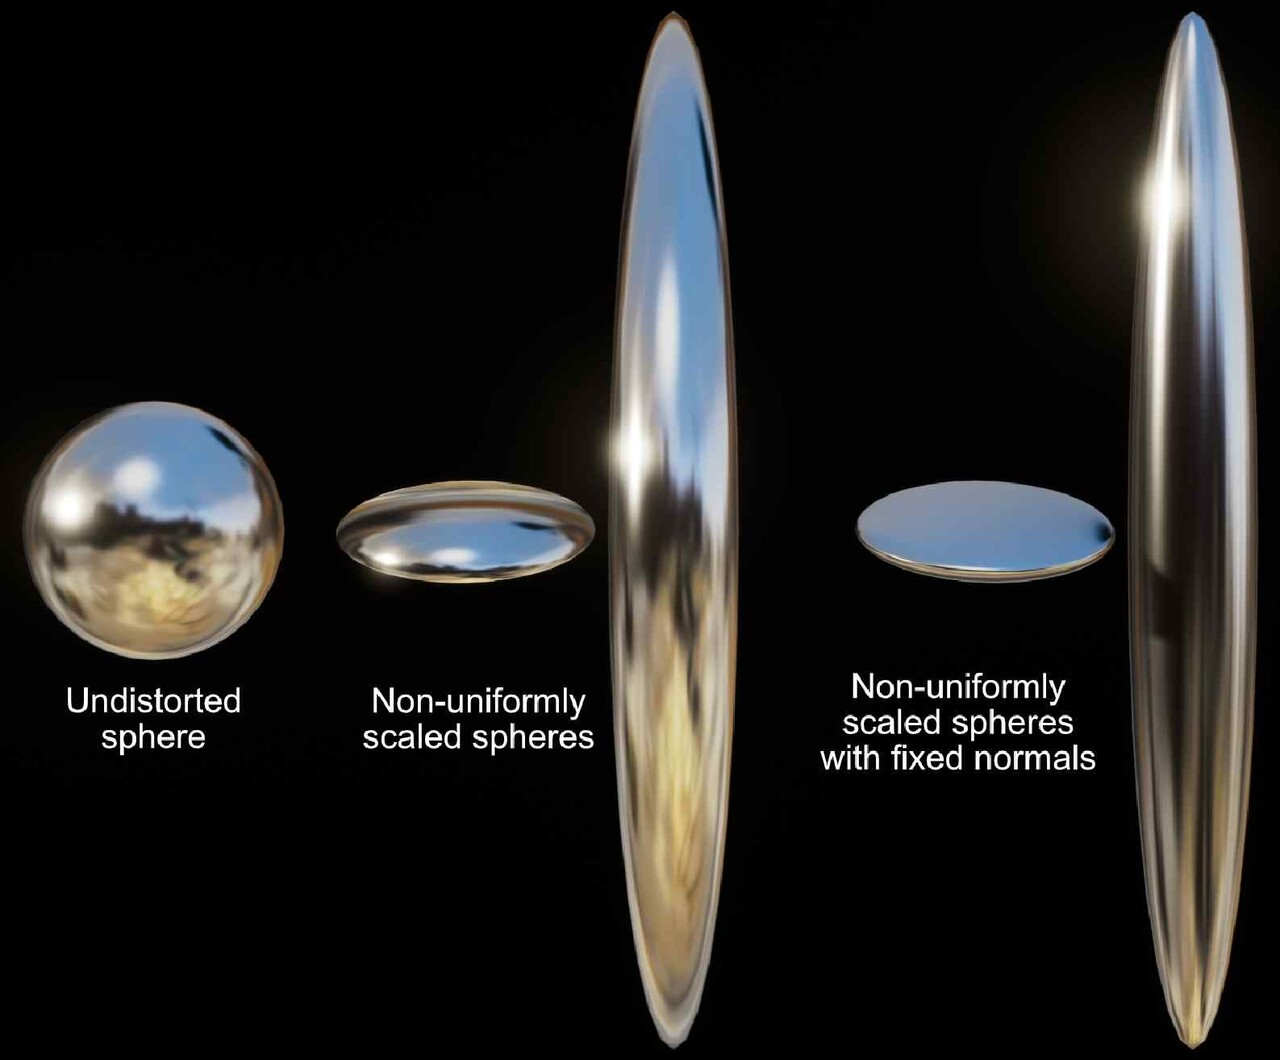
Both the reflections and the positions of the specular highlights illustrate how the normals change in the fixed version.
Performance
The fix described above added 19 instructions to the pixel shader. While this will not cause performance issues in most cases, it is a cost to be aware of and should not be routinely added to materials if your project doesn’t need it.
Update
Shortly after I posted this article, Brian Karis, Senior Graphics Programmer at Epic Games, commented on it, explaining that he had toyed with the idea of fixing this problem when Nanite was introduced, but decided against it because a proper fix would require several more changes in other parts of the engine. He also suggested fixing it on the CPU when creating the transformation matrix for the primitive.
https://mastodon.gamedev.place/@BrianKaris/111472135168861147
I’ll update this article once I’ve looked into his suggestions. For now, though, I think the fix described above is a reasonable workaround for people who don’t want to delve into engine modifications, but be aware that the process isn’t 100% correct, so your mileage may vary.