The most common way to implement night skies in games is to use a nice looking cubemap texture. The result usually looks good. And since cubemaps are a common feature in most engines, it’s usually a topic that doesn’t get much attention. That is, until you’re developing a game for a low-end platform with not much VRAM. Then you suddenly realize that your star texture is 26MB, which you really don’t want to spend on a single texture. And since the distance to the sky never changes, there’s nothing to be gained by streaming the texture, so it always loads at full resolution. And even though the texture is usually just one color, reducing the texture resolution isn’t an option either. Because stars are so small, often covering only 1-2 pixels, they will simply disappear if the resolution is too low.
Since I wasn’t really happy with the memory consumption of a cubemap just to display a few white spots in the night sky, I looked for other ways to render stars. In this tutorial I’ll show you how to do this by creating a star field mesh and using a material to make adjustments at runtime. This approach doesn’t use any textures at all, just a low-poly mesh and a simple material. I used Blender and Unreal for this, but all the features used for this technique can be found in other DCCs and engines as well. As a side effect, this technique also reduces the amount of GPU time needed to render the sky, since there is no cubemap to sample for every single sky pixel. This doesn’t really make a difference, though, since the effect is greatest when the player is looking at the sky, which is usually a situation where GPU time is not an issue anyway because there is almost nothing on the screen.
Creating The Mesh
It all starts with a single quad that will be a star. There’s not much to do with this quad, except to change the normals so that they point out instead of up:
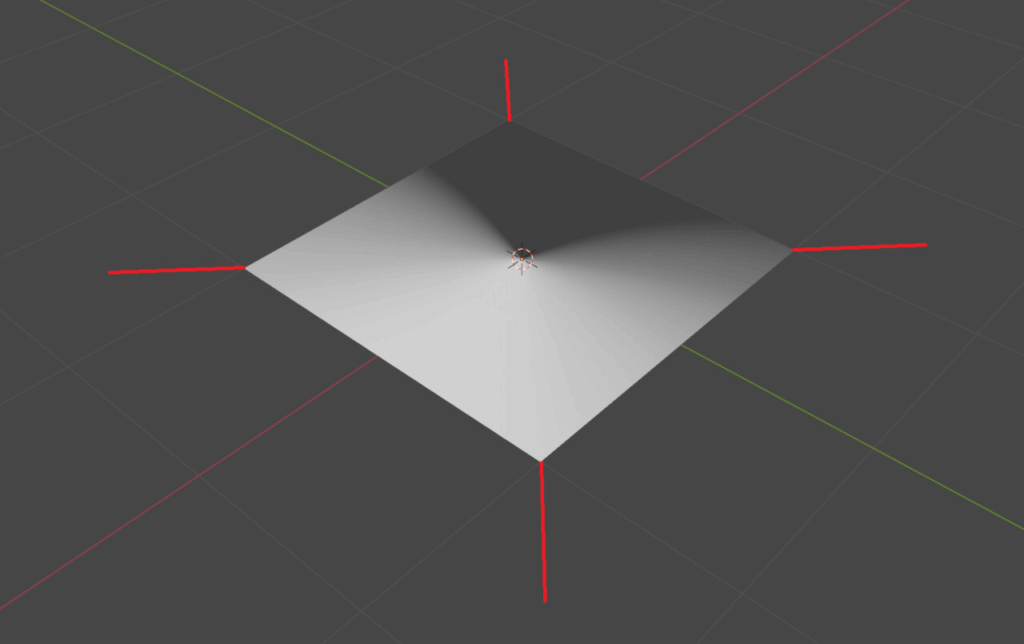
This will be important later in the material, as you will be able to resize the stars later.
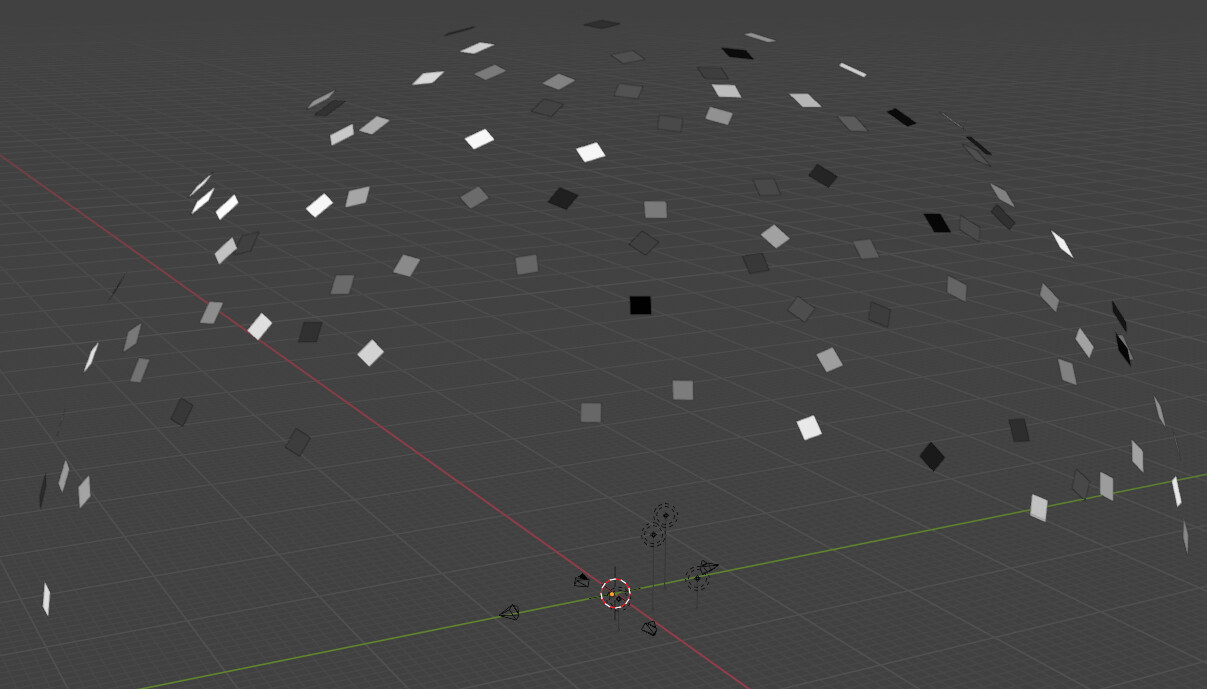
Next, copy the plane a few times and arrange the copies into a hemisphere:
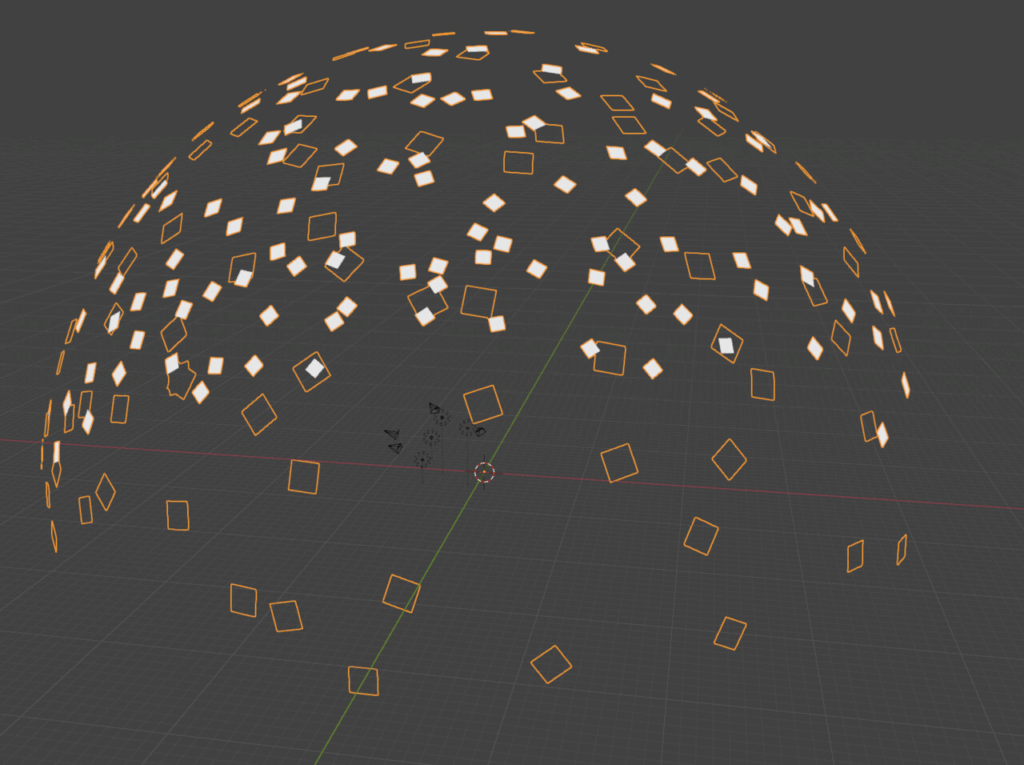
The size of the quads doesn’t really matter at this point, you’ll have an option to adjust the size in shader later on.
While this mesh is starting to resemble a starry sky, there is still one step missing: In order to add color and size variation in the material, we need a way to identify individual stars. A random value between 0-1 per star is the easiest way to do this and can be stored in the vertex colors. Since manually editing the vertex colors can be tedious, I used this script by Michel Anders:
It assigns a random grayscale value to each mesh element. Similar scripts exist for every single 3d software out there, and I recommend using them, they can be used for so many other things that the initial effort to find them and get them to work is time well spent.
Creating the Material
After exporting the mesh to Unreal, the next step is to set up the material graph:
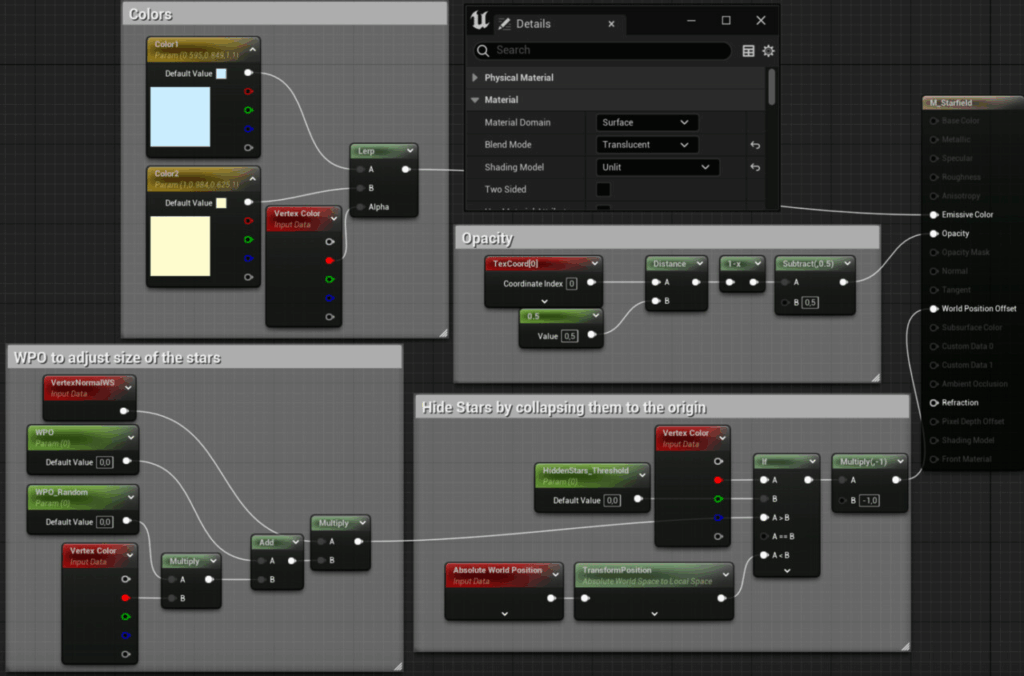
There are three critical features in this material:
- The vertices can be moved along the normals to adjust the size of the stars. This is important because you usually want the stars to be as small as possible without reaching sub-pixel size.
- The vertex color is used to add random variation to the color and scale of the stars.
- The vertex color is also used to hide stars. If their assigned value is below a certain threshold, all of their vertices are moved to the origin. This makes it easy to adjust the number of stars without having to go back to the mesh.
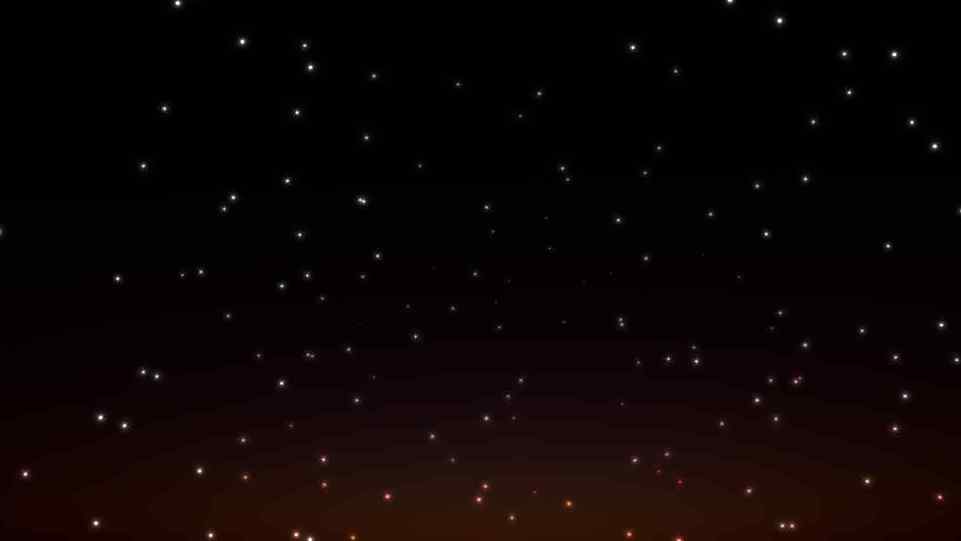
And voila, after placing the mesh in a level and assigning the material, this is the result:

Limitations
This way of rendering stars works especially well if you intend to separate other elements of your sky as well. I recommend creating the sky color procedurally in a shader (if you’re using Unreal, the SkyAtmosphere system already has you covered) and having your clouds as separate objects, be they billboards, particle effects or real volumetric clouds. If you are primarily working with static levels, but want a lot of details like nebulae or other objects in the sky, the old reliable cubemap approach is probably the way to go.
By the way, if you really want to delve deeper into creating backgrounds with geometry instead of textures, this SimonSchreibt article explains how Homeworld 2 created some stunning vistas without any textures:
Bonus Section
As you probably know, the human eye is most sensitive to light at the edge of its field of view. As a result, stars are often invisible when you look at them directly, but become visible when you look at them from the corner of your eye. You can easily replicate this effect in Unreal by multiplying the star’s opacity by the distance from the center of the screen:
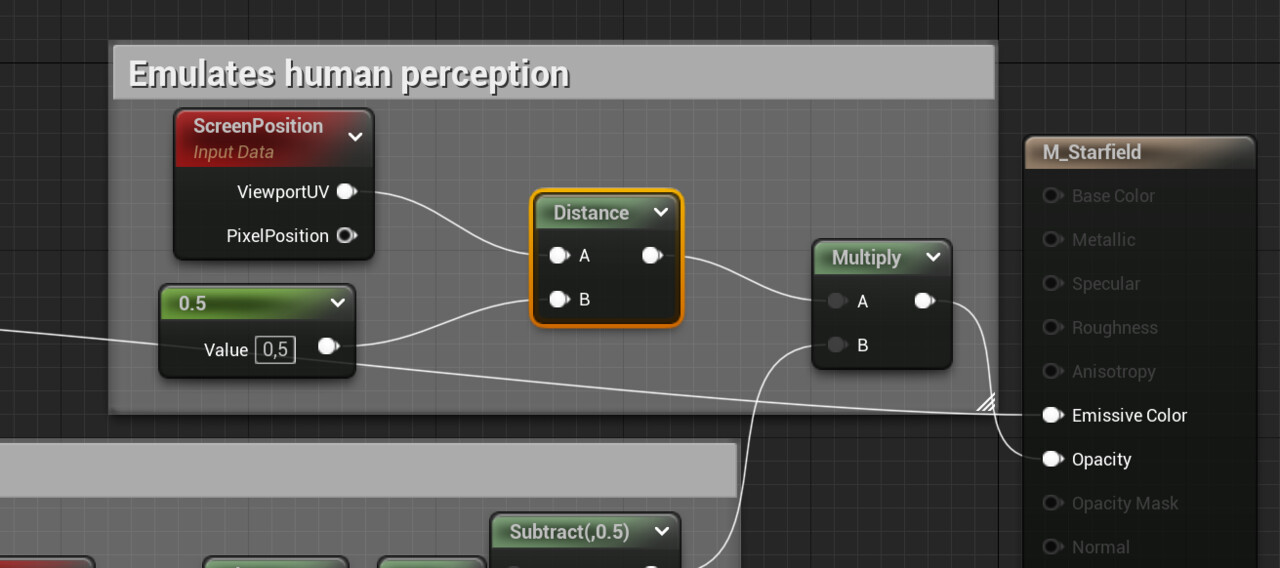
Whether you want to use this heavily depends on the visual target of your game: Do you want to emulate the human perception or rather have a cinematic feeling?