

This article is slightly different from my usual ones because it’s essentially just a collection of things I recently learned while searching for files on my PC. Typically, when I write articles, I aim to share obscure knowledge that people haven’t heard about. This article breaks with that approach, as it mostly covers well-known Windows features. Still, I know many people who use Windows Explorer every day to organize their files and aren’t aware of them, so I hope this article will be useful for at least some of them.
The article is split into two parts. The first deals with improving the search function in Windows. The second part shows you how to make navigating Windows Explorer more intuitive by enabling preview pictures for files that don’t have them by default. Hopefully, you will find the information in both parts useful.
Fixing the Search Function
The Situation
I’m not usually concerned with folder structures. Unreal’s Content Browser has a search function that lets me instantly search for combinations of asset names and metadata. Similarly, modern search engines let me access the vast majority of digitized human knowledge in a split second. However, if you ask me to find a file on my hard drive, I’ll probably need minutes, and I can’t guarantee that I’ll find it because the Windows search is not capable of doing so by default.
There are more sophisticated search tools, but you can improve Windows Search by changing a few settings so that it does what it’s supposed to do. Unless otherwise stated, all of the settings mentioned below can be found in Windows Search Settings.
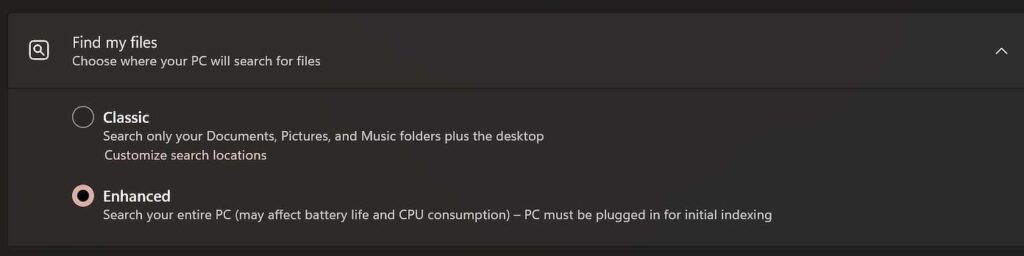
Enable the Enhanced Search
By default, Windows Search only indexes the Documents, Pictures, and Music folders, as well as the desktop. Obviously, there are many other locations in which you may want to find files. You can add additional locations manually if you want to, but I’d rather be safe than sorry. Enabling Enhanced mode ensures that your entire PC is indexed. To do so, open the Windows Search settings and change the “Find my files” option to “Enhanced.”
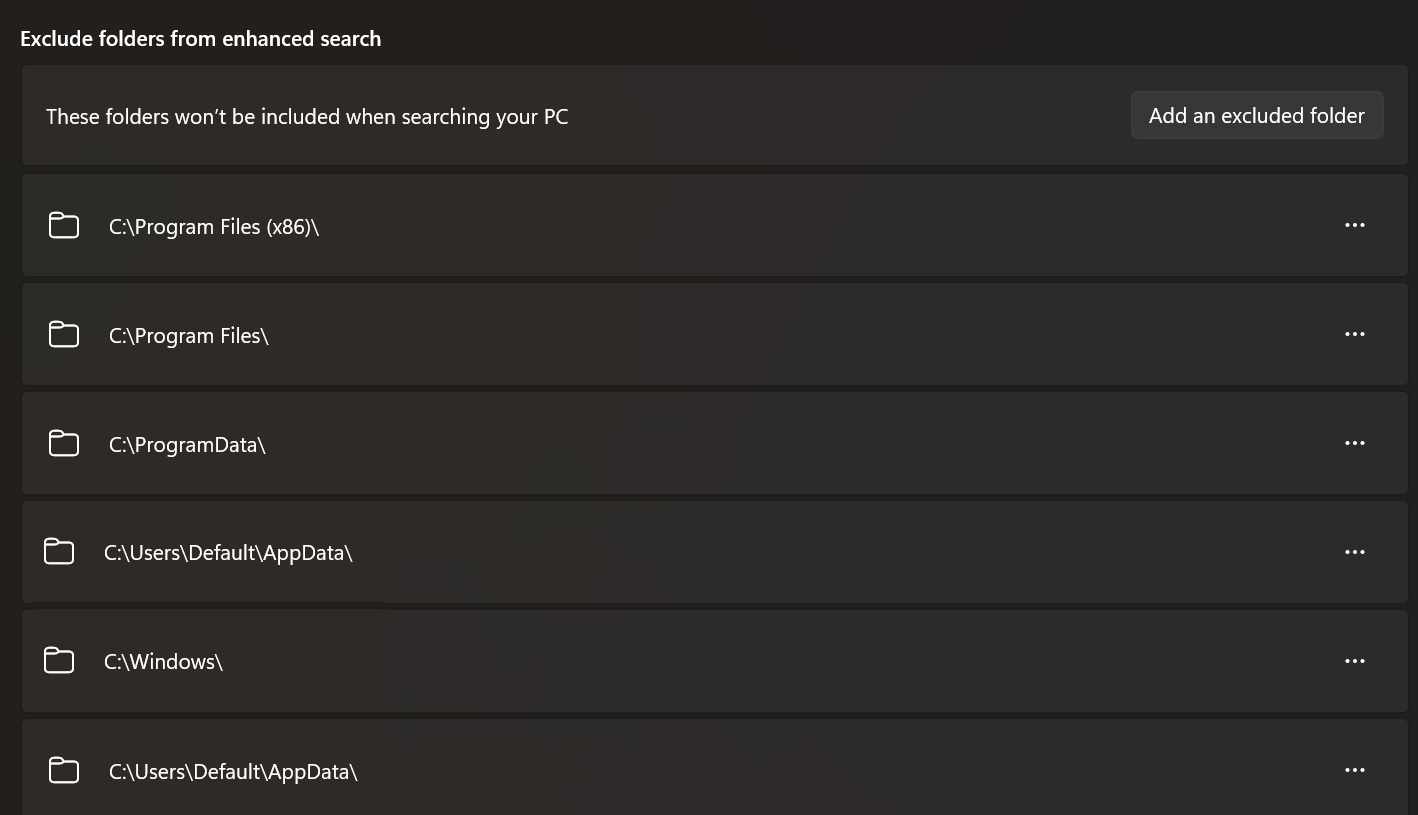
Don’t exclude the Programs folder
Another setting to consider: By default, Windows excludes many folders to reduce the likelihood that inexperienced users will stumble upon critical system files. I’m fine with the Windows folder being excluded, but I regularly look into the Program Files folder. The same goes for the AppData folder. Luckily, you can remove these folders from the exclusion list:
Search in More File Formats
This one is more specific and may not apply to you. Windows can search the actual content of text-based files. To do so, it has a list of file formats containing text that can be indexed. Well-known formats like .txt and .rtf are on that list by default. As a programmer, you may want to check that the format of the code you’re writing is also on the list. I had to add HLSL and GLSL, as well as USH and USF (Unreal’s format for shader code), since I write shaders from time to time.
To do so, open the advanced indexing options. The window that opens isn’t actually the one containing the advanced options, though. To open that, click the ‘Advanced’ button. In the newly opened window, switch to the ‘File Types’ tab. There, you will see a list of file formats. For each format, you can select whether Windows should index only the file name or the actual content as well. If you’re working with obscure file formats, it’s a good idea to check this list and extend it if necessary.
Search Content in Non-indexed Locations
Now that both the PC and the file contents are indexed, nothing can possibly slip through, right? Well, not exactly. When working with external hard drives, USB flash drives, or network drives, you often end up searching in unindexed folders. To ensure fast searching, Windows doesn’t search these locations for file contents. This makes sense, but if I have to choose between waiting a bit longer or not getting the results I need, I’ll always choose the latter. Luckily, there is a setting that lets you decide.
Interestingly, it’s not in the search settings. Instead, you have to open the File Explorer Options. The easiest way to access these options is to open the Start menu and start typing their name.
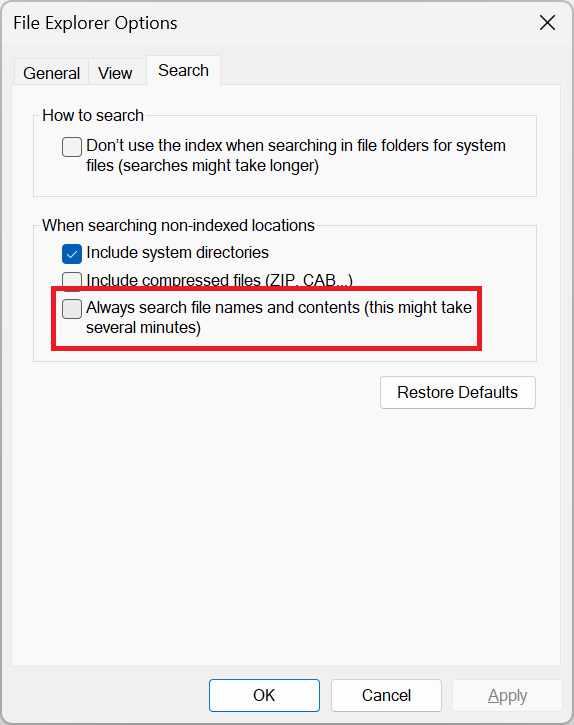
To ensure that nothing is ever skipped, enable “Always search file names and contents” in the Search tab.
Adding More Thumbnails
If you often work with art assets, you may have noticed that, aside from popular formats like PNG or JPEG, Windows Explorer doesn’t display proper thumbnails for them. Regardless of how good your naming convention is, being able to see your assets without opening them is a huge boon and can save you a lot of time.
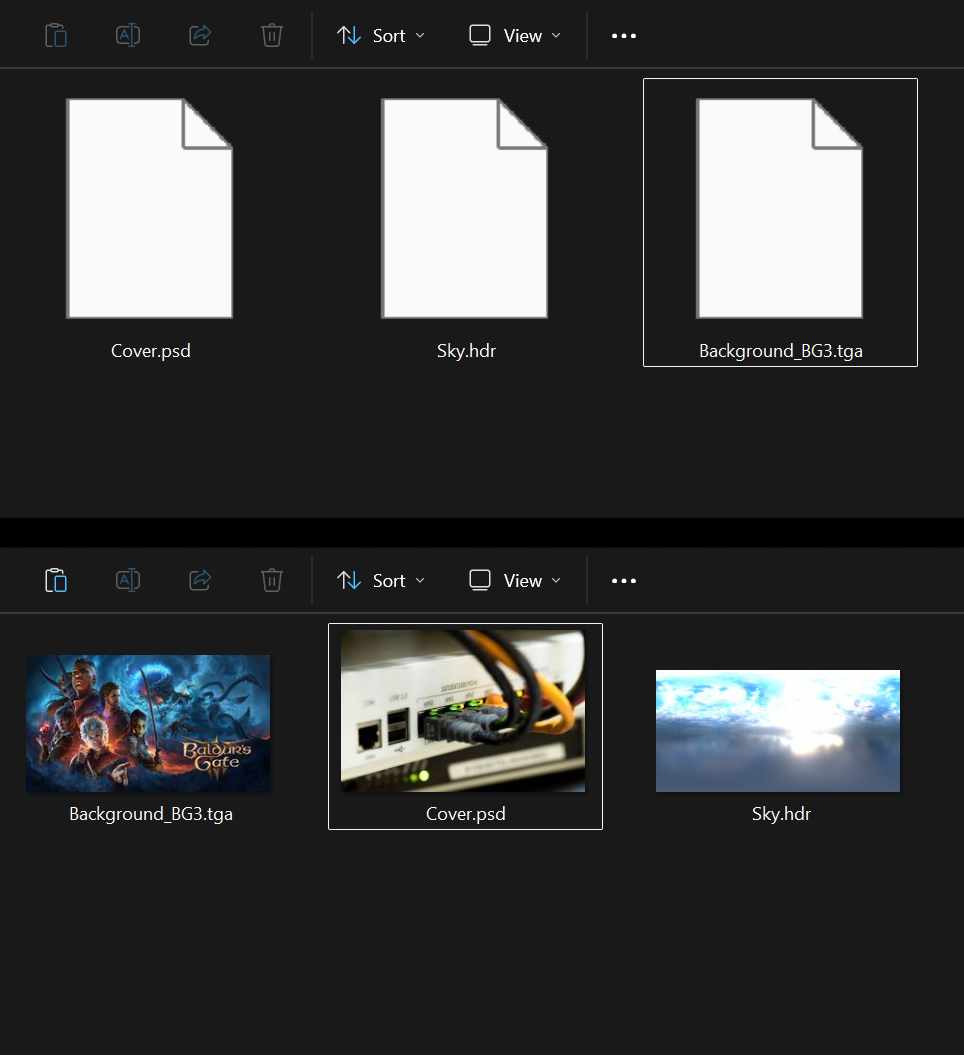
Fortunately, Windows Explorer can use other programs to generate thumbnails. If you’re missing thumbnails for a file format you use regularly, try a quick Google search. Perhaps there’s a tool that can generate them for you.
Below, you can find a short list of tools that I use for this purpose.
For FBX – F3D
F3D is a lightweight 3D viewer. It supports many formats, including gITF, USD, STL, OBJ, and Alembic. Most importantly for game developers, it supports FBX. For several of these formats, including FBX, it can generate thumbnails for Windows Explorer, making it useful even if you don’t use it as a viewer.
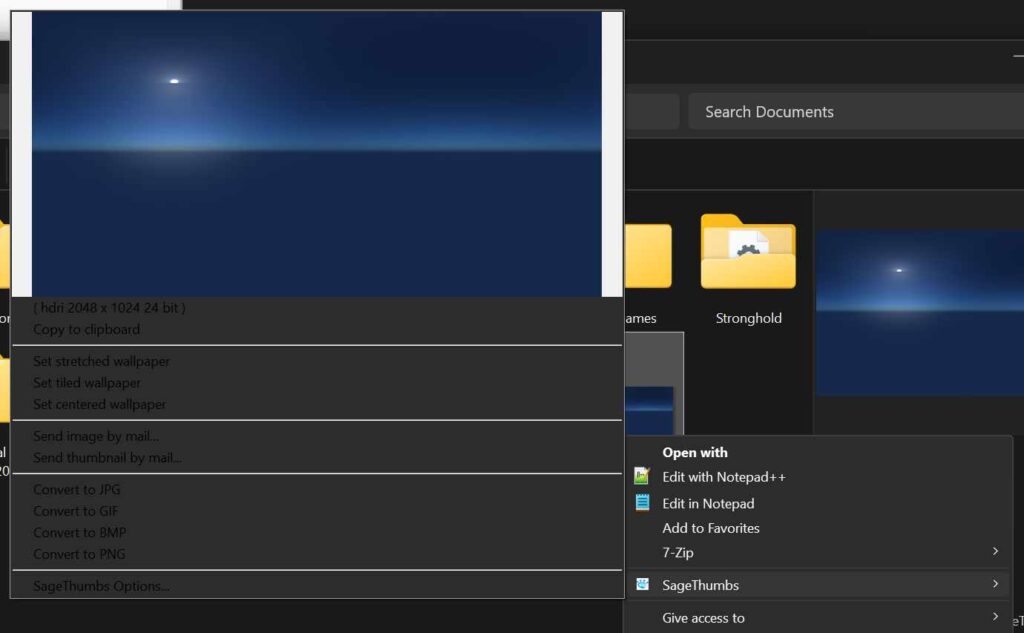
For TGA, HDR, DDS – SageThumbs
SageThumbs uses the GFL library, which is also used to display pictures in the popular XnView. Therefore, SageThumbs supports basically all relevant image formats. If you work with image files often, you should give it a try.
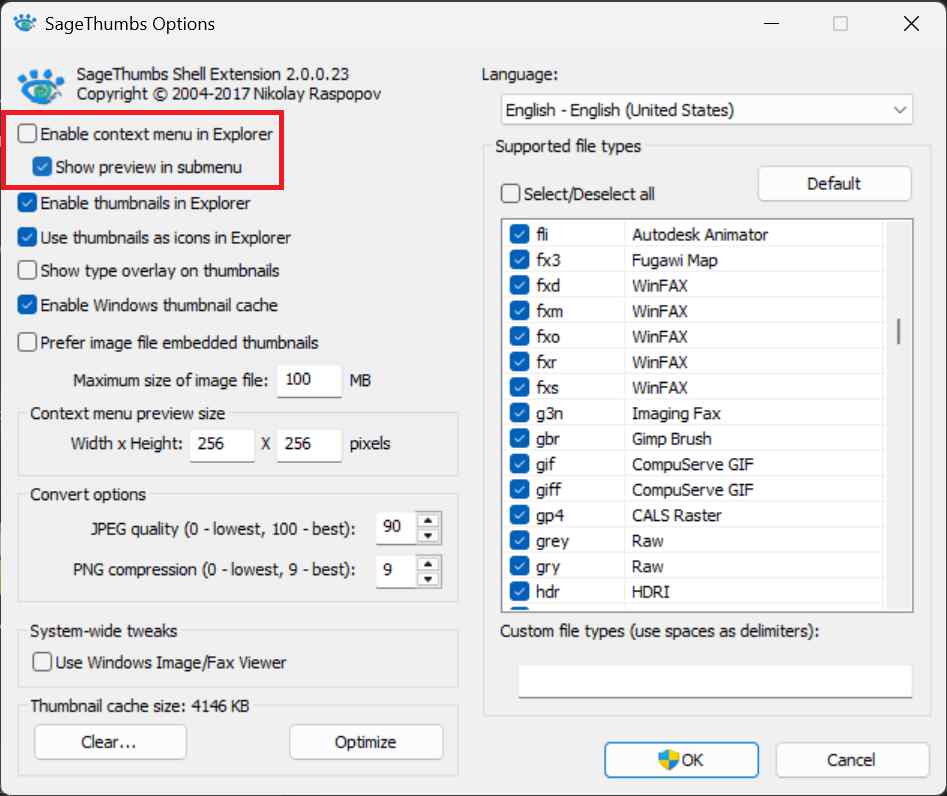
By default, SageThumbs adds a new entry to the file context menu. However, I didn’t find any of the features in this menu to be especially useful. If you’re using Windows in dark mode, it’s even broken because it uses a fixed font color.
After installation, your first step should be to disable it in the settings:
As I write this, I can’t help but want to look into the source code. Changing the font color based on the current Windows settings shouldn’t be too difficult, should it? If you’re curious, you can find the source code here.
For PDF – Sumatra
Sumatra is a minimalist, customizable PDF reader. Or so I’m told. I don’t use it that much, but I install it on every PC I regularly use because it creates thumbnails for PDF files.
When installing Sumatra, open the options and enable “Let Windows show previews of PDF documents” to enable thumbnail generation.

Closing Thoughts
I’m certain that some people reading this are already itching to tell me that there are superior file managers out there (e.g. Total Commander), which outclass the Windows Explorer in every discipline. And while that’s true, I often prefer sticking to the default tools that everyone’s familiar with. Even with the changes listed above, the Explorer can still be used the same way as before. So if I have to use another PC or if other people use mine, file navigation works the same everywhere. It’s just a bit better and more reliable. But please comment below if your experiences differ. Perhaps switching between file managers is less of a hassle than I think, or I’m missing out on features that I don’t even know I want.