

One of the upsides of working with Unreal is that you’ve the option to look at the source code and change it if necessary. But once you start working on bigger projects, this actually something that you learn to avoid, as it does bring some downsides:
- If your project takes longer than just a few months, you’ll probably want to update your engine version a few times, to take advantage of newly released features or to get fixes to existing bugs. But with every change you make to the original source code, updating to a newer version becomes more complicated because you have to merge your own changes with the changes made by Epic’s developers. Even trivial changes can make the update process significantly more cumbersome once they start to pile up.
- Once the project is finished, you can’t take your changes with you to the next project without combing through the engine’s source code and copying over each change. This can be especially challenging if your changes consist of a number of changes in different classes that are interdependent, so you have to track them down one by one.
- If you’re working on multiple projects in parallel, each using its own version of the engine, you can’t share these changes, so you have to make and maintain them for each project individually.
Thankfully, in many cases, these problems can be fixed using an Unreal feature called Core Redirects.
They allow you to redirect references to functions, classes, structs or properties to other ones at load time, without the need to re-compile your code when you choose to disable them again. So instead of changing a class, you create a child class of it. In this class, you can override functions of the original one, add variables or change the default values of variables, etc. Note that the tutorial below only covers class redirects, and have a look at the documentation below which other types exist and what they can be used for.
While core redirects are already a powerful feature, they get even better when you put them in a plugin, so that you can toggle them with the click of a button!
Below are all the steps required to create a toggleable core redirect that adds an additional asset registry tag to material instances. This tag tells the user how many textures are used by a material instance, making it easier to identify instances that are going overboard.
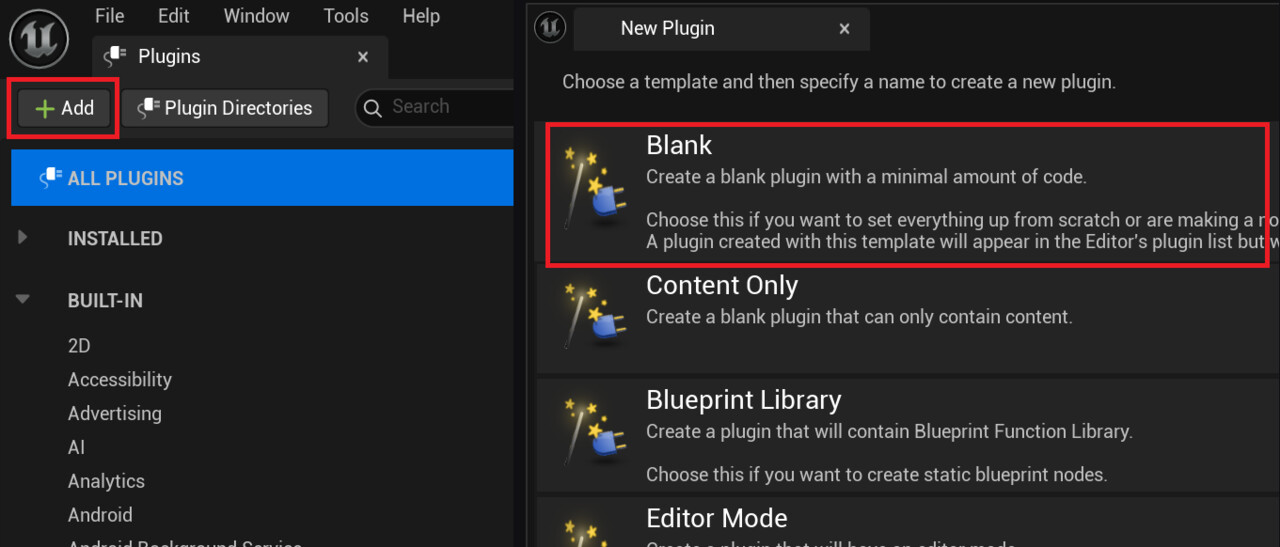
Step 1 – Creating the Plugin
First, create the plugin that will store your modified classes and the core redirects. This is very simple, just open the plugins window (Edit -> Plugins), click on the Add button and select the Blank template. Give your plugin a fitting name and description. After creating the plugin, Unreal will prompt you to restart the editor, then you’re done.
Step 2 – Creating the Child Class
Now create a new class, right-click anywhere in the Content Browser in a folder containing C++ classes and select the option New C++ Class….
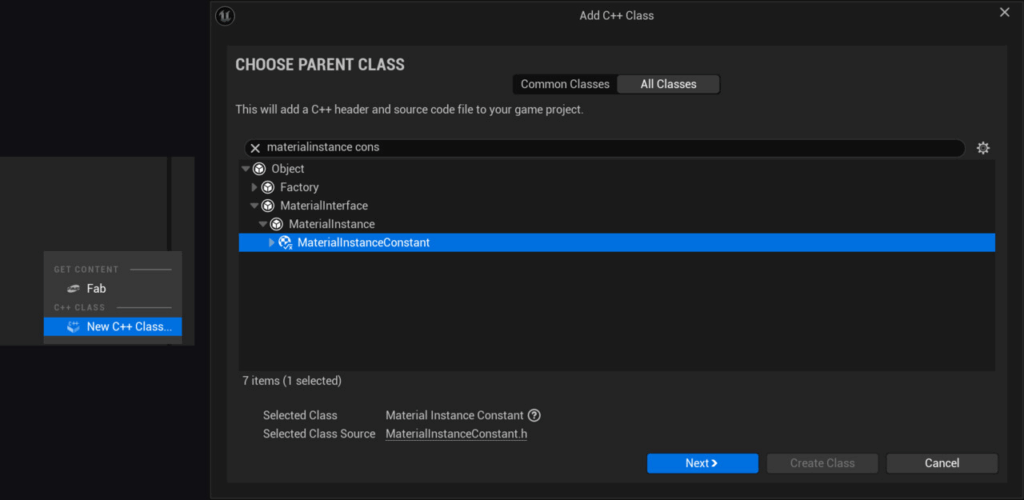
In the Add C++ Class wizard, select the parent class, in this case material instance constant, and select the folder of the newly created plugin as the location of the new class. Also make sure that the new class is public, and choose a fitting name. For this example, I didn’t want to be overly inventive and used the default name MyMaterialInstanceConstant. Close the editor and open your new class in Visual Studio.
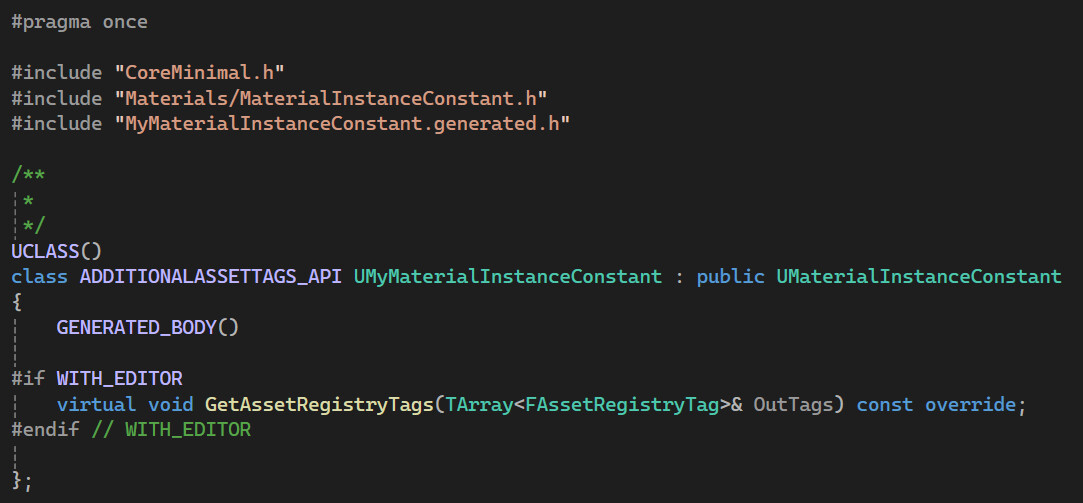
Step 3 – Adding the Asset Registry Tag
To add additional asset registry tags, first you need to indicate that you want to override the existing GetAssetRegistryTags() function. You can do this in the header of your new class, using the override keyword:
In the source file, add the actual implementation:
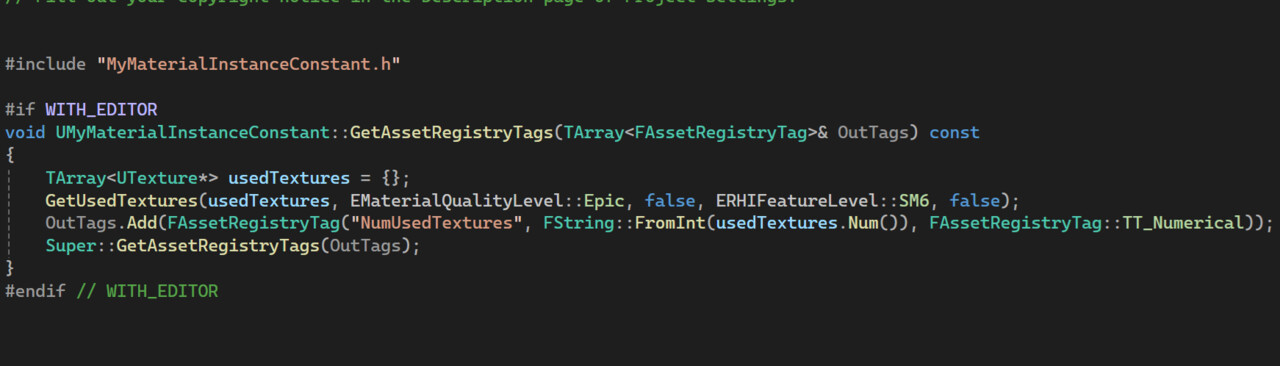
Since Unreal already provides the GetTextures() function, it’s very simple in this case. Important: The function still calls the implementation of its parent (Super::GetAssetRegistryTags). This call makes sure that aside from the logic added in the child class, material instances still behave the same as before.
Step 4 – Adding the Core Redirect
Now that the new class and the override function are in place, you still need to tell Unreal to use it as a replacement for the original one. To do that, navigate into the folder of your new plugin. It’s located in your project folder, in Plugins/[NameOfYourPlugin]. In my example, it’s Plugins/AdditionalAssetTags.
In that folder, create a Config folder, and place a config file in it. This config needs to be named Base[NameOfYourPlugin].ini. In this file, add these two lines, replacing MyMaterialInstanceConstant and AdditionalAssetTags with the names of your class and plugin:
[CoreRedirects]
+ClassRedirects=(OldName="MaterialInstanceConstant",NewName="/Script/AdditionalAssetTags.MyMaterialInstanceConstant")
These lines will redirect any reference to the MaterialInstanceConstant class to your newly created child class.
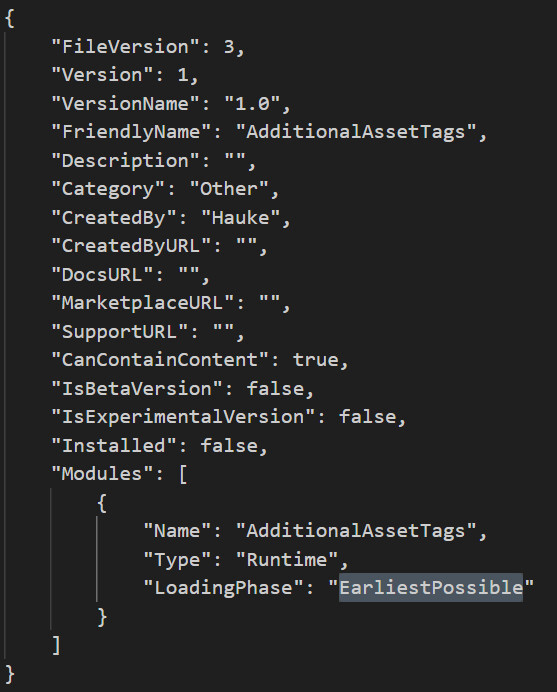
Step 5 – Adjusting the Loading Phase
Since the redirector changes Unreal’s behavior when loading assets, it needs to be loaded before the affected assets are loaded, otherwise redirecting the references will fail. To do this, open the .uplugin file of the created plugin (Plugins/AdditionalAssetTags/AdditionalAssetTags.uplugin), and change the LoadingPhase setting. The LoadingPhase enum controls when a plugin is loaded. For plugins containing redirectors, it needs to be set to EarliestPossible:
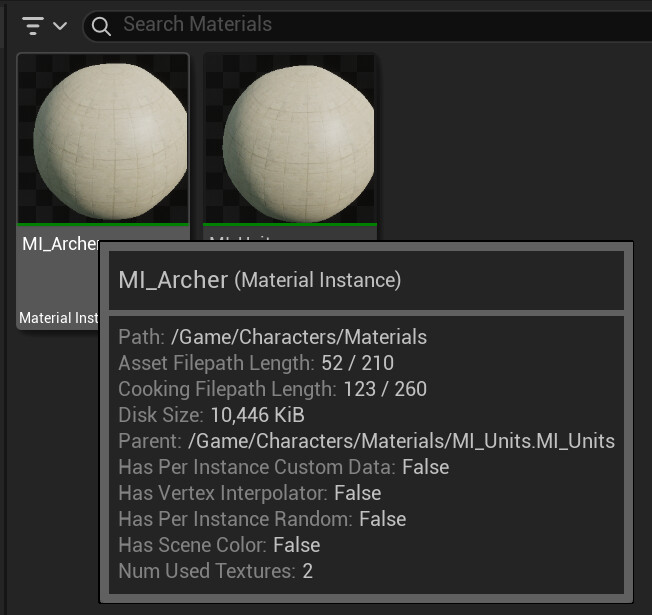
Step 6 – Testing the Result
Open the editor and check the tooltip of some of your material instances:
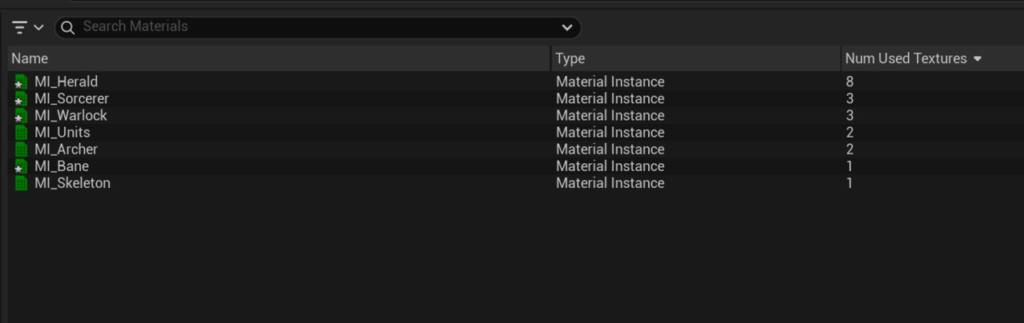
You can also use the search bar to use for specific tag values:

And, interesting in this case, you can even sort by tag:
Note: The asset registry tags are only created when assets are loaded. So for the search to give you complete results, you need to select all existing material instances in the project at least once. The tags then get saved for later, so you only have this to do whenever you create or change tags.
Step 7 – Disabling the redirect
Your engine change now works as expected, so the tutorial could end here. But of course there’s a chance you might want to disable it again for some reason, and since the promise of this tutorial was to make the engine change non-invasive and easy to revert, let’s see how that works.
At this point, simply disabling the plugin will cause problems if any assets that had their class changed as a result of the redirection have been saved in the meantime. That’s because they were saved as the new class, and when the plugin is disabled, that class no longer exists. Fortunately, you already know the solution to this:
Another core redirect.
In the plugin’s config file, comment out the previous core redirect (you want to keep it around to enable it if needed) and add a new one pointing in the other direction:
[CoreRedirects]
+ClassRedirects=(OldName="/Script/AdditionalAssetTags.MyMaterialInstanceConstant",NewName="/Script/Engine.MyMaterialInstanceConstant")
Now launch the Editor, locate any assets that use your custom class, and resave them. The resaved assets will now use the default class again.
Now you can safely disable the plugin again. Your engine change is gone without a trace.
Disclaimers
While core redirects are a handy tool in many situations, they do have some limitations.
- Redirects are evaluated when loading assets, but not when creating new assets. In the material instances example, the number of textures is displayed correctly for existing instances, but not for instances created later. To fix that, you can either restart the editor or reload the assets (Asset Actions -> Reload).
- If you use a lot of redirectors, you may end up with multiple redirectors for the same class. In this case only one of them is used. So use them sparingly and check the existing core redirects in BaseEngine.ini to avoid conflicts.